

Many hunters prefer European mounting because it saves space. In most cases, it only needs a fraction of the wall or a vacant corner to have an open exhibit. Many hunters prefer European mounts because of their longer life span due to their clean and thorough preparation.
In addition, European mounting is one of the easiest and cheapest ways of displaying an animal head. Otherwise known as Western skull mounts, this may only need a sharp knife, three to four hours of meat-stripping, and boiling. As a result, a spotless animal skull with its horns or antlers is produced.
Yet many steps have been added to the deer skull preparation as time goes by. Suppose you’re preparing for your first-ever European mount. Luckily, this article provides you with the steps and insights on making one. Read on and learn more about European mounting.
1. Prepare The Head
Cleaning the head includes the removal of the meat, brain, ears, and eyes. This process is a vital portion of the skull preparation, making or breaking the skull quality. Properly prepared skulls are easier to dry and mount, while the hastily or lazily prepared ones may require more preparation.
If you want your deer head to be properly cleaned, you may choose between the following:
- Dermestid Beetles
Hunters and museum curators have long proven to use dermestid beetles in animal skull cleaning. Dermestid beetles are insects that feed on animal flesh and organs. Today, hunters and anyone interested in skull cleaning and taxidermy go to stores like Boneyardbeetleworks.com and others to have their animal skulls cleaned.
Many prefer this method because it saves most of the skull, bones, and antlers. It also doesn’t cause discoloration, so the skulls and bones look natural. Many hunters and taxidermists view this step as a sped-up decaying process of the animals, making it closer to real decomposition.
Besides bringing your animal head to a dermestid beetle provider, you may also try to raise your colony of these insects, especially if you plan to collect more animal skulls.
- Maceration
Aside from dermestid beetles, one way to clean deer skulls is maceration. This involves boiling and soaking the animal head in chemicals. However, this is only preferred if the animal head is more complex than usual, as this could damage most of the skull if done longer. Yet many still choose this option because it is the less expensive choice. Moreover, it is suggested to hunters who want to practice the basics of skull cleaning. This may also seem ideal for a deer that has been field-dressed.
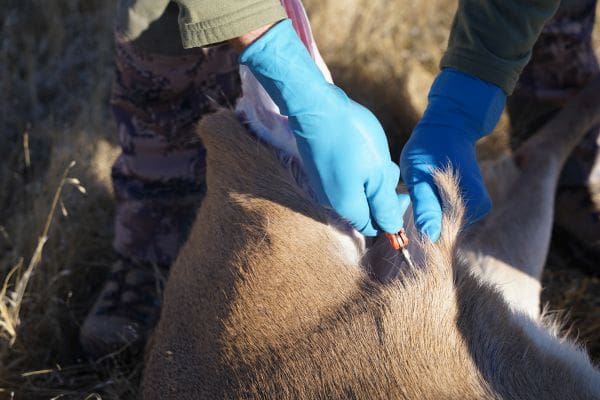
2. Remove The Meat
After preparing the head, you will need to scrape the flesh that wraps around and is within the deer’s skull. You may use forceps or pliers to remove the hard parts and tweezers to scrape the skin. You may use a skinning knife or scalpel to remove the hide and what’s left of the meat. A screwdriver may also help you to place a temporary gap between the jaws to make the process easier.
In doing the process, refrain from putting pressure on the skull, especially on the soft bones, as they may get cracks or damages. It’s also necessary to know whether the skull is from a young or old deer. The younger breed’s bones are more brittle than the old, thus they may need more caution in meat removal.
In some cases, some hunters and taxidermists use power hoses to remove the hidden flesh inside the skull. However, you need to estimate the pressure properly to prevent the jaws and bones from breaking apart.
3. Boil And Degrease The Skull
If you choose the dermestid beetle method, you have the luxury of skipping this step. For maceration, your skulls may still need the rigorous process of boiling and degreasing. Boiling is necessary to ensure that the skull and bones will be free from bacteria and grease even if mounted for a long time.
You should also avoid boiling the skull for too long to break the bones more quickly. Soaking the bones in scalding water for far too long may also shrink parts of the skull. You may wait for the remaining fat and flesh to break away from the bones. You may also follow the rule of thumb in boiling deer skull, which is two to three hours long depending on its size.
Apart from boiling, you need to degrease the skull to completely prepare the head for the coating application. Poorly degreased bones may not absorb finishes properly, thus they won’t have a desirable protective coating.
To ensure that your skull is free from fats and oils, you may apply the following:
- Dish Soap
Dish soap and a similar solution are a good option if you plan to make the bones free from any sticky film. Aside from the greasy appearance, this cleaning agent could eliminate the bones’ discoloration and pungent smell.
If it’s your first time degreasing a skull, you may find this process suitable for you because it’s easier to do than the other methods. In addition, dish soap and similar items are widely available and generally affordable.
Because the grease could resurface after some time, let the skull dry up after washing it for the first time. After that, repeat the cleaning process until no more oily films appear. For better application, you may need to use lukewarm water as this also helps break the extra flesh and skin away.
- Ammonia
If your skull turns yellowish, you may use a room-temperature solution of 1/2 quart ammonia to 10 gallons. Just dip the skull in a sealed jar or deep tray for the bones to turn white. This may take 10–14 days and result in a pearly white appearance. However, because ammonia is an active irritant, make sure that you use a protective mask and safety goggles while doing this process.
- Acetone
This could be the least tiring but the costliest option in skull degreasing. A tightly sealed container is needed to store the acetone in this method. For this purpose, you may also use a glass container as acetone is abrasive enough to dissolve plastics. Like in the ammonia method, you need to wear a protective mask, safety goggles, and specially made acetone-safe gloves. Aside from these, make sure that you’ll prepare the solution in a well-ventilated space.
To degrease the bones, you need to soak the skull inside the container and wait until it completely whitens. Many prefer this method because you can use the solution several times. It can no longer dissolve fats and oils only after it becomes dark orange.
- Baking Soda
This method is an extra step to any previous processes should they fail to whiten the skull. In this step, boil enough water until it simmers. Do not place the skull in the water while boiling, as this next round of boiling will already break the bones apart. After the water boiled and simmered, place a generous amount of baking soda in hot water. Then, place the skull until it pushes away the fats on and within the skulls’ surface.
4. Soak The Bones In Bleach Or Hydrogen Peroxide
If your deer skull went through the dermestid beetle method, it might need a special bleaching process to make it whiter. You may prepare a mixture of one part bleach for every 10 parts of water. The process shouldn’t exceed two days, and smaller skulls should not last more than a day.
Prepare a 5% hydrogen peroxide solution for macerated deer heads. Typically, the soaking of the skull in hydrogen peroxide may take around 12 hours. Small to average sizes will take 24 hours, while enormous deer heads may need a couple of days. In this process, avoid soaking the skull for too long as it may damage the bone structure.
You need to wear gloves and safety glasses to avoid eye and skin contact in the bleaching and whitening processes. Throw away the used solution to prevent any accidents after doing the procedure.
5. Rinse And Dry
After the previous steps of cleaning and soaking, you may rinse the skull with running water. Run the skull, including the insides, through the water until whatever dirt, flesh, and fat left are removed.
If some bones are detached, you may attach them back using wood glue or similar adhesives that are transparent after drying. This way, the skull’s natural color will remain. Once done, hang the skull to dry completely. You may also use a heater to ensure that it’s completely dry.
6. Add Finish And Preserve
Once the skull is dry, you could apply a whitening agent on the surfaces and crevices of the skull. Avoid brushing the antlers to retain their natural pigment. After the whitening agent application, wrap it with bubble wrap and masking tape before drying out quickly. Slowing the drying process helps the agent seep deeply into the parts of the skull. After half an hour, you could remove the wrap, wash it with running water, and dry it using a heater.
Another option to retain the natural color of the skull is by applying a polyurethane finish. Its coating has better oil, water, and tear resistance. You may also apply a clear lacquer for thicker protection and a cheaper option. For the least expensive choice, you may use a mixture of ordinary white glue and water. In any method, brush the solution evenly on all of the surfaces.
In choosing a finish, you may consider the color of the skull. Some skulls have different types of whiteness. Some are yellowish, while others look bluish or dirty white, depending on how the skulls reacted to finishes or cleaning agents.
7. Prepare Your Mount
After preparing the deer head, you can start choosing the type of mount or plate you’ll use. In choosing one, you may consider the size of the deer skull and the size and color of the wall or space you’ll mount in. Here are some of the most common options you may choose from:
- Traditional European Mount
You’ll just mount the skull on a bare wall with a hook in this option. This is preferred if the skull has properly attached bones and is compact enough not to fall out. It could also be the most space-saving option among your choices, as this is suitable if you have a limited area for mounting.
- Metal Hooker
This is similar to many traditional European mounts. The only difference is that it has different metal designs to complement the size and styles of the deer skull. You may check out customized configurations for a more appealing look.
- Wooden Plaque
Wooden plaques are advisable for deer skulls with natural colors if you are to consider the aesthetic quality. Yet, the biggest consideration in choosing this type is the size of the skull. These mounts are ideal for more enormous skulls, holding more weight than the traditional and smaller hooks. In many cases, wooden plaques hold all the corners and surfaces of the heads, so you won’t have to worry that the skull will fall.
Final Thoughts
For many hunters, a displayed deer skull is one prized trophy for their deer hunting. That’s why having one is on every hunter’s bucket list. In some cases, some deer heads are found to be rotten before they’re even harvested. Because of their state of decomposition, they’re more difficult to clean and preserve. To remove the smell and the decaying part, you may manually scrape the decomposing portions before undergoing the processes in this article.
If your deer head is fresh, you may start removing the hide as soon as you can. Then, choose the necessary steps that apply to your skull. Do you prefer an antlerless skull? Or would you rather have a well-cleaned and polished European mount? Whatever your preference is, consider the size and the quality of your skull.
If you prefer a professional method, you may start with the Dermestid beetles as it paves the way for a cleaner output. Meanwhile, choose maceration if you want a quick and less expensive option worthy of practice. Then, your subsequent decisions will depend on your aesthetics, budget, and the time and effort you are willing to give for the European mount preparation.